
A pleasant summer day might become a nightmare for home improvement due to a leaky pool filter tank, but do not panic! The good news is that resolving this prevalent issue will just need a few straightforward measures. Discovering the techniques for fixing a leaky pool filter tank may help you avoid wasting money on expert service calls and save a lot of time.
Undiscovered leaks in your pool’s filter tank could result in a system that filters poorly and wastes a lot of water. Furthermore, if continuous seepage is ignored over time, it may result in more serious damages or malfunctions. So, for all of you do-it-yourselfers out there, stay tuned as we unravel the mystery of fixing your leaking pool filter tank!
Why is My Pool Filter Leaking
One of the many possible causes of a leaky pool filter is worn-out or damaged O-rings. They are composed of caoutchouc, a material prone to deterioration with time. Therefore, it is advised to perform routine inspections and replacements on time to prevent unexpected leaks.
Another reason could be that the pump lid was not properly sealed; even though it looks to be securely fastened, pressure changes brought on by temperature variations could reduce the pump lid’s ability to stop water seepage.
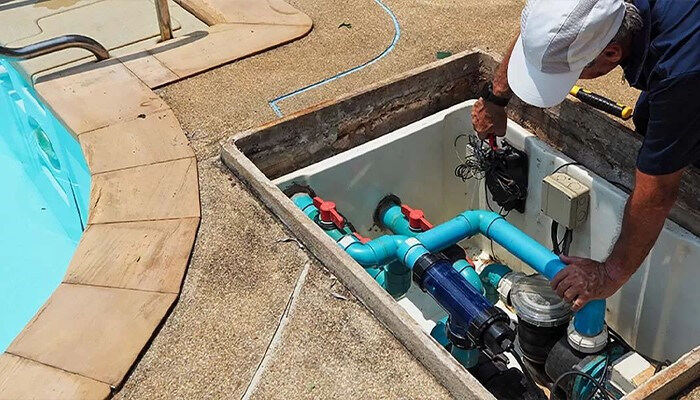
This problem can also be caused by misaligned valves; improperly routed valves following repair or cleaning can alter the dynamics of water flow and result in unanticipated leaks.
Cracks in the filter tank itself are another thing to take into account. These fault lines highlight the importance of frequent equipment checks because they are often minute yet sufficient to allow water leakage over time!
Pool filters serve vital purposes, and their deterioration has effects beyond merely unsightly puddles surrounding your pool area. These functions include replacing damaged O-rings and properly seating valves.
How to Fix Leaking Pool Filter Tank
Maintaining your pool and its equipment on a regular basis also helps to extend its lifespan.
Step 1: Identifying the Leak
Determining the source of the leak is the first step towards repairing a leaky pool filter tank. As valves and fittings are frequently the source of leaks, always check your pool filter on a regular basis for leaks. You can surround those spots with dye, which will be drawn in by any leaks. Look for permanent wet places or water trails that are never dry.
Step 2: Switch Off Power Supply
Prior to starting any repairs after you’ve located the leak, don’t forget to turn off any power sources connected to the filtration system and pool pump for safety. In an attempt to fix your pool, you run the risk of seriously injuring yourself or, worse, damaging the equipment with a careless operation of your filtration system.
Step 3: Identify The Type of Pool Filter Tank
Because the mechanisms of the various types of pool filters—sand, cartridge, or D.E.—vary, specific techniques are needed for repairs. Understanding your filter type will guarantee performance and stop additional harm.
Step 4: Repairing Leaking Valves Or Fittings
It may be necessary to replace the valve or fit it entirely with a new one if it has been found to be leaking. However, occasionally small problems like loose connections can be fixed by using the proper tool to tighten these pieces.
Step 5: Pump Seal Replacement
There’s a good probability that a deteriorated seal inside your pump shaft assembly is the cause of any water trickling down from underneath your pump assembly unit that you discover after closely inspecting it and not from any pipe fittings. This indicates when the pump seals need to be replaced right away, helping to maintain original efficiency and avert crippling leaks.
How to Repair a Leaking Pool Sand Filter
First, close the pressure relief valve and the pump. Prior to lifting the cover for inspection, make sure you empty the extra water from your sand filter tank.
It’s critical to identify the leak source by closely inspecting the body and valves of your pool filter. The zone in concern may be detected if you see water leaking from the bleed valve or loose joints between pipe connections.
The next step is to scrape off old gaskets and seals that have deteriorated over time as a result of chemical imbalances or normal wear and tear.
Epoxy sealant will come to your rescue if the leak starts inside the shell of the pool filter! Clean the area around the fault, then let it completely dry before filling up any holes or fractures that are allowing water to seep. Let the epoxy cure completely before putting your equipment back together in the original configuration.
Finally, do a pressure test to see whether each step was completed correctly and ensure that everything is sealed tightly. And there you have it! You’ve done it yourself: fixed that leaking pool sand filter!
Conclusion
Maintaining a pool might feel overwhelming, particularly when there is a leaky filter tank. Nonetheless, you ought to be able to find and fix any leaks by following the instructions provided in this article. Never forget to disconnect the power source in order to ensure safety before starting any repairs. Your pool filter tank’s lifespan is significantly increased by routine inspections and prompt maintenance. Thus, avoid waiting till it’s too late! Use these suggestions to maintain the best possible condition for your pool by including regular maintenance into your routine.